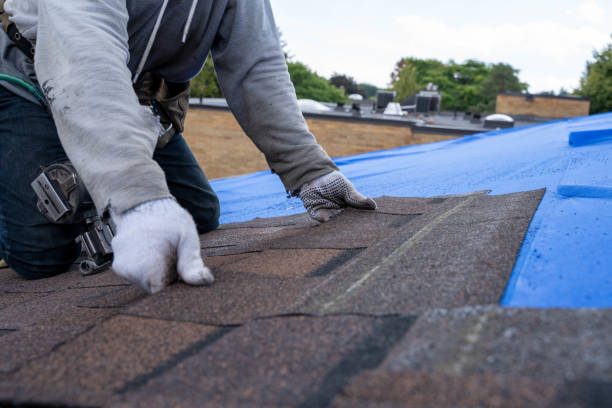
When planning a roofing project, understanding the costs and materials involved is essential to avoid unexpected expenses. A roofing calculator serves as an invaluable tool for homeowners and contractors alike, enabling accurate cost estimations and material requirements. Below, we explore how to effectively use a roofing calculator and how it simplifies the process of planning your roofing project.
How to Estimate Costs for Roof Replacements Manchester NH
- The total cost of materials
- Labor expenses
- Waste management costs
- Additional expenditures like fasteners, underlayment, and flashing
By inputting basic details like roof dimensions, pitch, material type, and geographic location into the calculator, you can generate estimates tailored to your specific project.
Key Components That Affect Roofing Costs
- Roof Size: The larger the roof area, the more materials and labor are required.
- Asphalt shingles: Affordable and widely used.
- Metal panels: Durable but pricier.
- Clay tiles: High-end option with long lifespan.
- Roof Pitch (Slope): Steeper roofs often require additional labor due to safety considerations.
- Geographic Location: Labor rates and material availability vary by region.
- Removal of Existing Roof (if applicable): Factoring in demolition costs for old roofing materials.
Using a Roofing Calculator Effectively
- Measure your roof’s dimensions or use a reliable roofing area calculator (detailed further in this article).
- Determine your roof’s pitch using simple tools like a pitch gauge or smartphone app.
- Choose your preferred roofing material based on budget and style preferences.
- Input all values into the calculator, including any additional components such as underlayment or ridge caps.
Example Cost Estimation Table
| Factor | Example Input | Estimated Cost ($) |
| Roof Area | 2,000 sq ft | $6,000 – $9,000 |
| Material Type | Asphalt Shingles | $1 – $4 per sq ft |
| Roof Pitch | Moderate (6/12) | ~10% higher labor |
| Removal/Demolition | Old Asphalt Roof | ~$1 – $3 per sq ft |
| Miscellaneous Supplies | Nails & Flashing | ~$200 – $500 |
This table illustrates how even small changes in variables can significantly influence overall project costs.
Tips for Reducing Roofing Costs
- Compare quotes from multiple contractors.
- Purchase materials during off-season sales.
- Opt for durable yet cost-effective materials like architectural shingles over premium options.
Final Thoughts on Roofing Calculators
A well-designed roofing calculator empowers homeowners to make informed decisions about their projects while avoiding unnecessary overspending. By accurately estimating costs through proper measurements and thoughtful inputs, you’ll save time and money while ensuring that every aspect of your project runs smoothly from start to finish.
Roofing Contractor Manchester NH: Choosing the Right Materials for Your Roofing Needs
Selecting the appropriate roofing materials for your project is a crucial step that affects not only the aesthetic appeal of your property but also its durability, energy efficiency, and long-term maintenance costs. A roofing material calculator can simplify this process by providing accurate estimates based on your specific needs. Below, we’ll explore how to choose the best materials for roofing projects and how to use a calculator effectively.
Factors to Consider When Choosing Roofing Materials
- Climate:
Some materials are better suited for specific weather conditions. For instance: - Asphalt shingles perform well in moderate climates.
- Metal roofs are excellent in areas with heavy snowfall due to their ability to shed snow easily.
- Clay tiles offer durability and heat resistance in warmer regions.
- Roof Pitch:
The slope or pitch of your roof influences material choice. For example: - Flat or low-slope roofs often require membrane materials like EPDM or TPO.
- Steeper slopes can accommodate shingles, tiles, or metal panels.
- Budget:
Different materials vary significantly in cost per square foot: | Material | Average Cost (Per Square Foot) | |——————-|——————————-| | Asphalt Shingles | $1 – $5 | | Metal Roofing | $5 – $14 | | Clay Tiles | $6 – $15 | | Slate | $10 – $30 | - Longevity and Maintenance:
Consider the lifespan of each material: - Asphalt shingles last around 20–30 years.
- Metal roofs can last 40–70 years.
- Slate and clay tiles often exceed 50 years with proper care.
- Aesthetic Appeal:
Choose a material that complements your home’s architectural style and enhances curb appeal.
How a Roofing Material Calculator Works
- Input Roof Dimensions: Provide the length and width of each roof section to calculate total surface area (in square feet).
- Specify Roof Pitch: Enter the pitch or slope value as this impacts surface area measurements and material requirements.
- Material Selection: Based on your preferences (e.g., asphalt shingles or metal), input details such as coverage per bundle or panel.
- Waste Factor Adjustment: A waste factor—commonly around 10%—is added to account for cuts, overlaps, and errors during installation.
- Results Overview: The calculator outputs estimated quantities of materials (e.g., bundles of shingles), ensuring you purchase an adequate amount without overspending.
Pros and Cons of Common Roofing Materials
| Material | Advantages | Disadvantages |
| Asphalt Shingles | Affordable, easy installation | Shorter lifespan compared to others |
| Metal | Durable, lightweight | Higher upfront cost |
| Clay Tiles | Fire-resistant, great insulation | Fragile; requires reinforced framing |
| Slate | Natural appearance, long-lasting | Expensive; heavy |
Tips for Using a Material Calculator Effectively
- Double-check measurements for accuracy before inputting data.
- Include all areas such as dormers or overhangs when calculating roof dimensions.
- Account for additional features like valleys or skylights that may impact material requirements.
- Use data from manufacturers regarding coverage rates per unit (shingle bundles/panels).
By carefully considering these factors and leveraging a reliable roofing material calculator, you can ensure your project stays on track both financially and structurally while achieving optimal results tailored to your specific needs.
Roofing Material Calculator: Finding the Best Roofer Manchester NH for Your Project
Selecting the proper materials for your roofing project is a crucial decision that impacts not only the durability and functionality of your roof but also its cost-efficiency and aesthetics. A roofing material calculator can simplify this process by helping you estimate quantities, costs, and suitability based on your specific requirements. Here’s a comprehensive guide to choosing the right materials for your roof.
Factors to Consider When Selecting Roofing Materials
- Climate: Different materials perform better in certain weather conditions. For example:
- Asphalt shingles are ideal for moderate climates.
- Metal roofing excels in areas with heavy snow or rain due to its durability.
- Clay tiles are perfect for hot regions as they reflect heat effectively.
- Budget: Roofing costs vary significantly depending on the material. While asphalt shingles are budget-friendly, slate or clay tiles are more expensive but offer greater longevity.
- Roof Pitch: Some materials work better on steep slopes (e.g., slate), while others are more suitable for low-slope or flat roofs (e.g., membrane roofing).
- Weight Load: Heavier materials like concrete or clay tiles may require additional structural support.
- Aesthetics: The appearance of your roof should complement your home’s architecture and style.
Common Types of Roofing Materials
| Material | Lifespan | Cost per Square Foot* | Key Benefits | Common Drawbacks |
| Asphalt Shingles | 20-30 years | $1-$4 | Affordable, versatile | Susceptible to wind damage |
| Metal | 40-70 years | $5-$12 | Durable, energy-efficient | Higher upfront cost |
| Clay Tiles | Over 50 years | $7-$15 | Heat-resistant, long-lasting | Heavy; requires strong support |
| Slate | 75+ years | $10-$20 | Elegant appearance | Expensive; labor-intensive installation |
| Wood Shingles | 25-30 years | $6-$9 | Natural aesthetic | Prone to fire damage unless treated |
*Costs may vary based on location, supplier, and labor expenses.
How a Roofing Material Calculator Helps
- Roof Area: Enter the total square footage of your roof (calculated using a roofing area calculator).
- Material Type: Select the desired material to estimate its cost per square foot.
- Waste Factor: Include an extra percentage (usually 5–10%) to account for cutting waste during installation.
Using these inputs, you can determine quantities and costs with precision. This tool prevents over-ordering or underestimating supplies—saving both time and money.
Tips for Selecting Materials
- Research warranties offered by manufacturers.
- Consult with professional roofers for insights about local standards or building codes.
- Prioritize energy-efficient options such as reflective metal panels or cool asphalt shingles if you live in hot climates.
By carefully evaluating all aspects of your project and leveraging tools like a roofing material calculator, you’ll ensure that you choose durable, cost-effective materials tailored to your needs while avoiding unnecessary expenses.
Roof Installation Manchester NH: Understanding Roof Slopes and Their Importance
The pitch of a roof is a critical aspect of its design, impacting not only the aesthetics but also the functionality and durability of the structure. Understanding roof pitch, its measurements, and why it matters is essential for homeowners, contractors, and roofing professionals.
What is Roof Pitch?
Roof pitch refers to the slope or steepness of a roof. It is commonly represented as a ratio between the vertical rise and the horizontal span (run) of the roof. For example, if a roof rises 6 inches for every 12 inches of horizontal run, the pitch would be expressed as “6/12.” This ratio helps determine how steep or flat a roof appears.
Roof pitch can also be expressed in degrees by measuring the angle from the horizontal plane. However, using ratios like “4/12” or “8/12” is more common in roofing calculations and industry standards.
How to Measure Roof Pitch
- Step 1: Gather Tools
You’ll need a tape measure, level (preferably at least 12 inches long), pencil, and calculator for this process. - Step 2: Identify Start Point
Place one end of your level against the base of your roof (e.g., near an eave). Ensure it’s perfectly horizontal by checking the bubble indicator on your level. - Step 3: Measure Vertical Rise
From where your level meets the edge of your roof, measure straight up vertically until it touches the underside surface at another point X distance away horizontally from Level origin piece´s extension-plane below-top-edge perspective). Note that measurement as rise height..
Repeat these tests multiple spots nearest generic-frame-median across-sloped surfaces confirm consistency finalizing true-pitch-calibrations deriving rational-resultant-rationals
Essential Tools and Tips for Accurate Roofing Calculations
Accurate roofing calculations are the foundation of any successful roofing project. Whether you’re a professional contractor or a homeowner tackling a DIY project, having the right tools and techniques ensures efficiency, cost-effectiveness, and precision. This guide will delve into the essential tools you need and provide tips for accurate calculations.
Must-Have Tools for Roofing Calculations
- Measuring Tape: A durable measuring tape (at least 25–50 feet) is key for measuring roof dimensions.
- Laser Distance Measure: For large or high-pitched roofs, laser distance measurers provide accuracy without requiring direct access to every roof surface.
- Roofing Square: Used to calculate angles and check the straightness of edges.
- Pitch Gauge: Helps determine the slope of your roof accurately, often included in some smartphone apps as well.
- Calculator or Roofing Software: Digital calculators or roofing-specific software can quickly process measurements into square footage or material requirements.
- Chalk Line Tool: Assists in marking straight lines on surfaces for cutting or alignment.
- Drone with Camera (Optional): Ideal for viewing hard-to-access areas without physically stepping on unstable sections.
Pro Tips for Accurate Roofing Measurements
- Measure the length and width of each section of the roof at ground level if possible.
- Multiply these dimensions to calculate square footage of each section.
- Roof pitch significantly affects material needs. Use a pitch gauge to determine vertical rise over horizontal run (e.g., 4/12).
- Apply this factor when calculating total area: | Pitch Ratio | Multiplier | |————–|————| | 3/12 | 1.04 | | 6/12 | 1.12 | | 9/12 | 1.25 | | 12/12 | 1.41 |
- Shingles or other roofing materials require overlaps to prevent leaks, typically adding around 10–15% extra material beyond the roof’s size.
- During cutting or fitting materials around vents, chimneys, and edges, waste is inevitable. Account for an additional buffer of approximately 5–10% when ordering supplies.
- For roofs with dormers, hips, valleys, or other architectural features:
- Divide the roof into smaller sections.
- Measure each section individually before summing up total square footage.
Utilizing Technology in Roofing Calculations
- Roofing Software Solutions
Platforms like RoofSnap or EagleView use aerial imagery to deliver precise roof measurements without manual labor. - Mobile Apps for On-Site Assistance
Many mobile apps include built-in pitch gauges and calculators that streamline processes while reducing human error. - Drones as Inspection Tools
Drones equipped with high-resolution cameras allow you to safely inspect difficult-to-reach areas while collecting data essential for accurate calculations.
Final Words on Accuracy
Investing time in careful planning pays dividends during installation by reducing costs associated with overordering materials or redoing work due to miscalculations. Using proper tools combined with smart techniques ensures results that meet both safety standards and aesthetic expectations while minimizing unnecessary expenses for your project.
- Expert Tips for Roof Installation Manchester NH Homeowners Need to Know
- The Importance of Hiring a Professional Roofer Manchester NH for Proper Roof Installation
- Manchester NH roofing: Your Ultimate Guide to Estimating Costs and Materials
- The Ultimate Guide to Manchester NH Roofing Installation and Replacement
- Tips for Choosing the Right Roofing Contractor Manchester NH for Your New Roof Installation
- Step-by-Step Guide to Reshingle a Roof with a Roofing Contractor Manchester NH
- The 8-Step Process for Manchester NH Roofing: Replacing Your Roof from Start to Finish