A new roof is a significant investment that enhances the safety, functionality, and aesthetic appeal of your home. Whether you’re replacing an old roof or building one for a new structure, understanding the essentials of roof installation can help ensure the process is smooth and successful. Below are key considerations and tips to guide homeowners through this important project.
Choosing the Right Roofing Material
The type of roofing material you select has a considerable impact on durability, energy efficiency, and overall appearance.
– Asphalt Shingles: Affordable and widely available with various color options.
– Metal Roofing: Durable, low-maintenance, and energy-efficient.
– Clay or Concrete Tiles: Stylish and long-lasting but heavier than other options.
– Slate: Natural, elegant, but more expensive and requires additional structural support due to its weight.
Consider factors such as climate conditions in your area, maintenance requirements, budget constraints, and architectural style before making a decision.
Hiring a Qualified Roofing Contractor
Professional installation is critical to ensure your new roof performs efficiently over its lifespan.
1. Verify licenses and insurance coverage to protect both parties during the project.
2. Request references or reviews from previous clients to assess reliability and quality of work.
3. Obtain detailed estimates in writing that outline costs for labor, materials, permits, and cleanup.
Preparing Your Home for Roof Installation
Before installation begins:
– Clear the attic space as debris may fall during construction. Cover valuable items with protective sheeting if moving them isn’t feasible. – Remove outdoor furniture or decorations near the house to prevent accidental damage. – Notify neighbors about potential noise or disruptions during construction.
Proper preparation minimizes stress during the process.
Importance of Proper Ventilation System Design
Ventilation plays an essential role in extending your roof’s lifespan by regulating temperature and moisture levels in your attic space: – Adequate ventilation prevents heat buildup that can deteriorate shingles prematurely.
Essential Reasons to Hire a Roofer Manchester NH for Quality Roof Installation
Roof installation is a critical aspect of home construction and maintenance. A properly installed roof provides structural integrity, protects the home from environmental damage, and enhances energy efficiency. While some homeowners may be tempted to cut costs with DIY solutions or hiring inexperienced contractors, professional expertise is crucial for ensuring a quality roof installation. Below, we delve into why professional involvement is indispensable.
Professional roofers possess in-depth knowledge about various roofing materials and systems. They can guide homeowners to select the best options tailored to their specific needs, climate conditions, and budget.
- Asphalt Shingles: Affordable, durable, and widely used for residential homes.
- Metal Roofing: Long-lasting and energy-efficient but requires specialized knowledge for proper installation.
- Clay or Concrete Tiles: Ideal for hot climates but heavier and requiring substantial structural support.
- Slate Roofing: Extremely durable but expensive and labor-intensive to install.
Professionals understand the pros and cons of each material type, helping you make informed decisions that align with your goals.
Proper roof installation involves meticulous attention to detail in areas such as underlayment placement, flashing installation, shingle alignment, gutter integration, and sealing techniques.
- Water leaks or improper drainage
- Reduced lifespan of the roofing material
- Increased vulnerability to wind damage
Licensed contractors are trained to follow industry best practices while adhering to local building codes.
Roof installations often require permits depending on local regulations. Professionals handle the permitting process on their client’s behalf, ensuring compliance with all applicable laws. This helps homeowners avoid potential fines or rework due to non-compliance.
| Aspect | DIY Attempt | Professional Installation |
| Permit Handling | Homeowner-managed | Contractor-managed |
| Compliance With Building Codes | Risk of oversight | Guaranteed compliance |
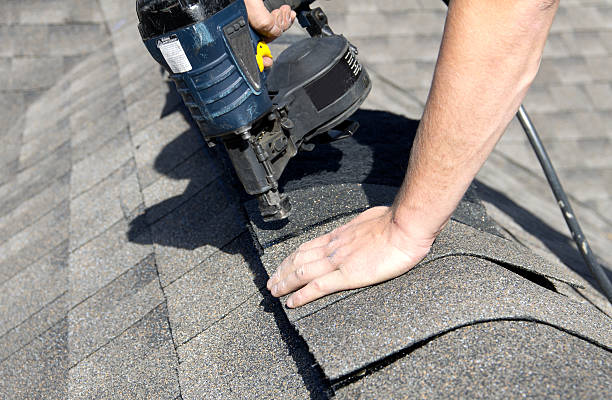
Roofing projects require specialized tools like nail guns, safety harnesses, ladders/scaffolding systems designed for steep angles, cutting tools for precise trimming of shingles/tiles, etc. Without these resources—and without knowing how to use them correctly—homeowners risk subpar results or even injury.
Hiring professionals ensures that proper tools are utilized efficiently throughout the project.
Many professional roofing companies provide warranties on both materials used as well as workmanship quality offered during installations—a safeguard against unforeseen issues arising later down post-work completion timeline!
- Lifetime warranty coverage over premium-grade shingle lines
- Five-year service repair guarantees
Such assurances significantly minimize future repair/replacement costs ensuring peace-of-mind post-investment
In conclusion Professional Roof Installations represent long-term solid-value aligning durability aesthetics-compliance
Essential Tips for Roof Installation Manchester NH Homeowners Should Know
Whether you’re looking to enhance your property’s value, improve energy efficiency, or replace a damaged roof, there are critical factors to evaluate before proceeding. Making informed decisions not only ensures the success of the project but also helps you avoid unnecessary expenses in the long run. Below are the key considerations every homeowner should keep in mind.
The choice of material has a significant impact on the longevity, appearance, and cost of your roof.
- Asphalt Shingles: Affordable, widely available, and easy to install. Lifespan ranges from 15-30 years.
- Metal Roofing: Durable and energy-efficient with an expected lifespan of 40-70 years. It can be costlier upfront.
- Clay or Concrete Tiles: Known for their durability and aesthetic appeal but require strong structural support due to their weight. Lifespan exceeds 50 years.
- Slate Roofing: A premium option that provides unmatched longevity (75+ years), but comes at a higher price point.
It’s important to select materials suited to your climate and architectural style while considering both short-term costs and long-term benefits.
Understanding the total cost of installation is essential for avoiding financial surprises during the project.
- Material costs
- Labor charges
- Removal of the old roof (if applicable)
- Additional repairs (e. g.
- Permits or inspection fees
For larger projects, it may be prudent to request multiple quotes from licensed contractors before making your decision.
| Climate Condition | Recommended Materials | Additional Features |
| Hot/Arid Regions | Metal roofing, clay tiles | Reflective coatings for heat resistance |
| Wet/Humid Areas | Asphalt shingles with mold resistance | Proper drainage systems |
| Snowy/Cold Climates | Slate roofing, metal with snow guards | Insulation layers for heat retention |
| High Wind Zones | Impact-resistant asphalt shingles | Reinforced fasteners |
Choosing weather-compatible materials supports durability while reducing maintenance needs over time.
Hiring an experienced roofer is crucial for ensuring high-quality installation.
- Verify licenses, certifications, and insurance coverage.
- Request references from past clients.
- Confirm they offer warranties on both labor and materials.
A reputable contractor will also provide detailed estimates and timelines before starting work.
- Slope/Pitch: Steeper roofs shed water more effectively but may increase labor costs during installation.
- Ventilation: Ensuring proper airflow reduces moisture buildup in your attic space and extends the lifespan of roofing components.
Proper ventilation systems include ridge vents, soffit vents, or attic fans depending on your home’s structure.
Check local building codes early in the planning process to ensure compliance.
By taking these factors into account ahead of time, you can achieve a successful roofing project that meets both functional requirements and aesthetic preferences while staying within budget constraints.
Steps for Seamless Roof Replacements Manchester NH Homeowners Need to Know
A new roof installation is a significant home improvement project that requires careful planning and execution. Understanding each step in the process can help homeowners better prepare, ensure quality outcomes, and avoid unnecessary stress. Below is a detailed breakdown of the key steps involved in a seamless new roof installation.
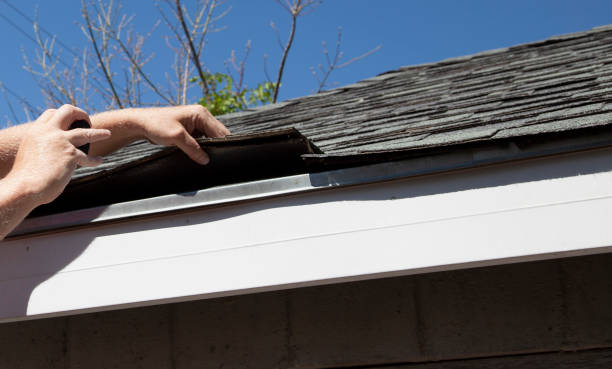
The roofing process begins with a thorough inspection of the existing roof (if present) or the structure where the new roof will be installed. A professional roofer will: – Assess the condition of shingles, flashing, gutters, and vents (if applicable). – Identify signs of damage such as rot, leaks, or structural issues. – Determine whether repairs or reinforcements are necessary before installation.
Choosing the right materials is essential for durability and aesthetics. Homeowners should work closely with their contractor to select materials that suit their climate, budget, and style preferences.Asphalt Shingles: Affordable and versatile.Metal Roofing: Durable and energy-efficient.Clay or Concrete Tiles: Long-lasting but heavier.Slate Roofing: Premium appearance with high durability.
Factors to consider during material selection: | Factor | Importance | |————————-|———————————————–| | Climate suitability | Resistance to wind, rain, snow, or heat | | Longevity | Lifespan of material | | Maintenance requirements| Ease of upkeep | | Cost | Budget-friendly options |
Preparation involves several critical steps to ensure smooth execution: – Protecting landscaping around your home from debris using tarps or plywood sheets. – Removing old roofing materials (if applicable). – Inspecting decking underneath the removed roof for potential issues like rot or water damage.
Before installing roofing materials, an underlayment must be applied over the decking to provide waterproofing protection. Flashing is then installed around vulnerable areas such as chimneys, skylights, valleys, and vents to prevent water infiltration.
Key benefits of this step include: – Enhanced moisture resistance. – Improved insulation performance.
This step involves securely attaching your chosen roofing material based on manufacturer guidelines. Proper alignment and spacing are critical during this phase to maintain both function and appearance.
Proper ventilation ensures airflow through your attic space while preventing condensation buildup that could damage your roof over time.
Types of ventilation systems include: – Ridge vents – Soffit vents – Gable-end vents
A well-installed ventilation system prolongs your roof’s lifespan by reducing excess heat and moisture buildup.
Once installation is complete: 1. The contractor will perform a final inspection to verify proper alignment, sealing, flashing placement, etc. 2. Any waste material from construction (e. g. , nails/shingles) will be removed from your property. 3. A warranty might be issued for both labor and materials used during installation.
Adhering carefully to these steps helps ensure long-term performance while avoiding costly repairs down the road. Working with an experienced contractor familiar with best practices is crucial for achieving reliable results without complications.
How Long Does the Process of New Roof Installation Typically Take?
Understanding these variables is crucial for setting realistic expectations and minimizing disruptions during the project.
Factors Influencing Roof Installation Time
- Size of the Roof:
Larger roofs naturally require more time to install than smaller ones. A small residential roof may be completed in one to two days, while larger or more complex projects could take up to a week or more. - Type of Roofing Material:
The material you choose plays a significant role in determining installation time:
| Roofing Material | Estimated Installation Time |
|————————–|———————————-|
| Asphalt Shingles | 1-3 Days |
| Metal Roofing | 2-5 Days |
| Slate Tiles | Up to a Week or More |
| Wood Shakes | Approximately 3-5 Days | - Roof Complexity:
- Weather Conditions:
Adverse weather conditions such as rain, wind, or extreme heat can delay installation. Most professional roofing contractors will monitor the weather forecast closely to avoid interruptions and safety concerns.
Typical Timeline for New Roof Installation
- Removal of old roofing materials
- Inspection for damage in decking or underlying structures
- Repairs or replacement if necessary
- Installation of underlayment and waterproof barriers
- Placement of shingles, tiles, metal panels, or other chosen materials
- Securing flashing around chimneys and vents
- Cleanup and debris removal
- Final inspection by both contractor and homeowner
Tips for Keeping Your Project on Schedule
Homeowners play an important role in ensuring smooth project management.
- Ensure all necessary permits are obtained before starting work.
- Choose readily available roofing materials rather than custom orders that may have long lead times.
- Work with a reliable contractor who has experience managing timelines effectively.
- Clear your driveway or access points prior to construction so workers can transport materials efficiently.
By understanding these factors and working closely with your roofing contractor from start to finish, you’ll have better clarity on how long your installation will take while avoiding unnecessary surprises.
Mistakes Homeowners in Manchester NH Roofing Projects Should Avoid During Installation
A roof installation is a significant investment that requires careful planning and execution. Below are key mistakes to watch out for and how to mitigate them.
Skipping Professional Installation
While DIY projects can save money upfront, roofing is a complex task requiring specialized skills and tools. Hiring experienced roofing contractors ensures your roof is installed correctly and meets local building codes.
Why Professional Help Matters:– Proper installation techniques prevent leaks. – Professionals understand weather-proofing methods. – They ensure compliance with permits and regulations.
Choosing Low-Quality Materials
Opting for cheaper materials might seem like a way to save money, but it can compromise the lifespan and durability of your new roof. High-quality materials may have higher upfront costs but offer better long-term protection against weather damage and wear.
Key Material Considerations: | Material Type | Average Lifespan | Benefits | |——————–|——————-|—————————| | Asphalt Shingles | 20-30 years | Affordable, easy to install | | Metal Roofing | 40-70 years | Durable, energy-efficient | | Clay Tiles | 50+ years | Long-lasting, aesthetic charm |
Ignoring Ventilation Needs
Proper ventilation is crucial in maintaining the health of your roof structure. Without adequate airflow, heat and moisture can build up in your attic, leading to mold growth or structural damage over time.
Signs of Poor Ventilation:– Excessive attic heat during summer. – Visible mold or mildew in attic spaces. – Uneven temperature distribution throughout your home.
To ensure proper ventilation: – Install ridge vents along the peak of your roof. – Include soffit vents for airflow at the eaves. – Use professional guidance to assess ventilation needs specific to your home design.
Failing to Secure Permits
Roof installations often require permits from local authorities. Neglecting this step may result in fines or issues when selling your property later on. Always check with your roofing contractor regarding necessary permits before work begins.
Steps for Securing Permits:1. Contact local building authorities to confirm requirements. 2. Ensure all paperwork is submitted before starting the project. 3. Verify that inspections are completed after installation.
Overlooking Routine Maintenance Post-Installation
Once the roofing process is complete, some homeowners neglect ongoing maintenance. Regular inspections help identify minor issues—like loose shingles or damaged flashing—before they worsen into major problems.
Maintenance Tips:– Schedule annual professional inspections. – Remove debris like leaves from gutters and downspouts regularly. – Address missing shingles or leaks immediately upon discovery.
Avoiding these common mistakes not only protects your investment but also extends the life of your roof while enhancing its performance over time. Proactive decision-making at every stage will ensure you get maximum value out of your new roofing system while minimizing unexpected complications later on.
Permits and Regulations You Need to Understand Before Installing a New Roof
However, before starting, it’s critical to understand the local permits and regulations that govern roofing projects. Navigating these requirements ensures your installation meets legal standards, avoids penalties, and protects your home in the long term.
Why Permits Are Necessary
Permits are essential for ensuring safety and compliance with building codes. Local governments enforce these codes to maintain structural integrity, energy efficiency, and fire safety. By obtaining the necessary permits, you help safeguard your investment and ensure that contractors follow professional standards.
Some reasons why roofing permits are required include: – Verification that materials meet local building codes – Ensuring the roof can withstand local weather conditions – Preventing improper installations that could lead to safety hazards
Common Types of Permits for Roof Installation
The specific permits required vary by location, but here are some common types: 1.Building Permits: Required for major structural changes or complete roof replacements. 2.Zoning Permits: Needed if the project alters the property’s appearance or footprint significantly. 3.Environmental Permits: Applicable if roofing involves hazardous material disposal (e. g. , asbestos). 4.Historical Property Permits: Required when working on homes designated as historical landmarks.
Always consult your local building authority to determine which permits apply to your project.
Steps for Obtaining Roofing Permits
Follow these steps to ensure compliance with local regulations: 1.Research Local Requirements
Begin by contacting your city or county’s building department. They will provide guidelines on what permits are needed and how to apply.
- Hire a Licensed Contractor
Many professional roofers handle permitting on behalf of homeowners, streamlining the process while ensuring compliance. - Submit Necessary Documentation
Prepare detailed plans of the proposed work, including materials used, structural changes, and waste disposal methods if applicable. - Pay Permit Fees
Fees vary depending on location and scope of work but are typically based on project size or value. - Schedule Inspections
Many jurisdictions require inspections during different phases of installation (e. g. , removing old shingles or adding new layers).
| Permit Type | Typical Cost Range | Timeframe for Approval |
| Building Permit | $150–$500 | 1–2 weeks |
| Environmental Permit | Varies | 2–4 weeks |
| Historical Property Permit | $100–$300 | 3–6 weeks |
Key Regulations Homeowners Should Be Aware Of
Material Restrictions: Certain areas have rules about roofing materials based on fire resistance or sustainability factors.Energy Efficiency Standards: Some states mandate roofs meet specific energy-efficient standards (e. g. , cool roofs in California).Structural Load Limits: Your roof must be able to support additional weight from new materials without compromising safety.
Tips for Staying Compliant During Roof Installation
To avoid potential delays or fines: – Double-check permit expiration dates; some may require renewal if delayed. – Regularly communicate with contractors to ensure they follow approved plans. – Keep copies of all documentation related to permits in case of inspections.
By understanding and adhering to these guidelines regarding permits and regulations, you’ll help ensure a smooth roofing process while safeguarding your home’s value and structural integrity over time.
Tips for Ensuring Proper Ventilation for Your Newly Installed Roof
Proper ventilation is a critical yet often overlooked aspect of roof installation. A well-ventilated roof not only improves the comfort and energy efficiency of your home but also prolongs the lifespan of your roofing materials. Below, we explore key tips to ensure adequate ventilation for your newly installed roof.
Why Roof Ventilation Matters
- Moisture Control: Adequate ventilation helps to prevent condensation, which can lead to mold growth or wood rot over time.
- Extending Roof Lifespan: Overheated or moisture-laden attics can cause roofing materials to deteriorate prematurely.
There are several types of ventilation systems you might consider for your new roof.
| Type | Description |
| Ridge Vents | Installed along the peak of the roof, allowing warm air to escape naturally. |
| Soffit Vents | Placed underneath eaves to enable entry of cool air into the attic space. |
| Gable Vents | Used on gable ends to promote cross-ventilation between opposite openings. |
| Turbine Vents | Wind-driven vents that actively extract hot air from the attic. |
| Powered Attic Fans | Electric or solar-powered fans designed for enhanced airflow in large spaces. |
Tips for Ensuring Proper Ventilation
- Conduct a Professional AssessmentHave a roofing professional evaluate the existing ventilation system before installation begins. They can recommend improvements tailored to your home’s layout and regional climate.
- Balance Intake and ExhaustFor optimal performance, maintain a 50/50 balance between intake vents (soffit vents) and exhaust vents (ridge or gable vents). This ensures constant airflow throughout the attic space.
- Choose High-Quality MaterialsInvest in durable venting materials that are resistant to weathering, such as rustproof metal or UV-protected plastic.
- Avoid Over-VentilatingWhile proper airflow is essential, overloading your roof with unnecessary vents can disrupt air balance and potentially compromise energy efficiency.
- Inspect Your InsulationEnsure that insulation does not block airflow through soffit or ridge vents during installation. Use baffles if necessary to create unobstructed channels for air movement.
- Adhere to Local Building CodesAlways confirm that your venting system complies with local regulations regarding minimum requirements for attic airflow per square footage.
- Regular MaintenanceAfter installation, periodically inspect vents for blockages caused by debris, nests, or snow accumulation.
Signs of Poor Ventilation
- Excessive heat buildup in upper floors during summer
- Persistent musty odors indicating mold growth
- Increased energy bills due to HVAC inefficiency
- Visible condensation on windows or walls
- Warped or deteriorating shingles
By addressing these issues promptly with proper adjustments to vent placement or design, you can protect both your home’s structural integrity and indoor comfort levels over time.
Ensuring correct roof ventilation during installation may require additional planning upfront but ultimately delivers long-term benefits such as improved energy efficiency and reduced maintenance costs.
- Expert Tips for Roof Installation Manchester NH Homeowners Need to Know
- The Importance of Hiring a Professional Roofer Manchester NH for Proper Roof Installation
- Manchester NH roofing: Your Ultimate Guide to Estimating Costs and Materials
- The Ultimate Guide to Manchester NH Roofing Installation and Replacement
- Tips for Choosing the Right Roofing Contractor Manchester NH for Your New Roof Installation
- Step-by-Step Guide to Reshingle a Roof with a Roofing Contractor Manchester NH
- The 8-Step Process for Manchester NH Roofing: Replacing Your Roof from Start to Finish